Every podcaster eventually hits a ceiling with USB microphones. While they offer convenience, true audio excellence requires an XLR microphone paired with a dedicated audio interface. An interface converts analog audio signals from your microphone into digital audio data that your computer can process.
Using the best budget audio interface for podcasting provides superior preamps. Preamps boost your microphone signal cleanly, preventing the annoying hiss and background noise common in cheaper setups. Professional podcasters know that clean audio keeps listeners engaged. Poor audio quality remains the number one reason listeners abandon a new show.
Furthermore, a dedicated interface gives you physical controls. You can instantly adjust your gain, monitor your audio levels, and mute your microphone. This tactile control saves you from fumbling through software menus during an important interview. It also allows you to upgrade your microphones over time while keeping the same reliable interface. If you want to dive deeper into building your studio, check our guide on podcast equipment setup for beginners.
Key Features to Look For in a Podcast Interface
Choosing the right equipment requires understanding technical specifications. You do not need an engineering degree, but knowing these features helps you make an informed decision.
Input and Output Connections
The number of inputs dictates how many microphones you can record simultaneously. Solo podcasters only need a single XLR input. However, if you plan to host in-person guests, you need at least two inputs. Look for combo jacks that accept both XLR cables for microphones and quarter-inch cables for instruments. You also need dedicated headphone outputs for zero-latency monitoring. This ensures you hear your voice exactly as it records, without any distracting digital delay.
Clean Preamps and Phantom Power
Condenser microphones require electrical power to function. This power, known as 48V phantom power, travels through the XLR cable from the interface to the microphone. Your chosen interface must feature a phantom power switch. Additionally, the preamps must offer enough clean gain to power dynamic microphones. Many popular broadcast dynamic microphones require significant gain. If the interface preamps are weak, you will need to buy an expensive inline booster, defeating the purpose of a budget interface.
Loopback Functionality
Loopback remains a crucial feature for modern podcasters. This feature allows you to record audio playing from your computer directly into your podcasting software. If you conduct interviews over video calls or want to play sound effects and intro music live, loopback makes the process seamless. Without it, you have to rely on complicated software routing solutions. You can learn more about routing audio in our tutorial on recording software integration.
Top Picks: Finding the Best Budget Audio Interface for Podcasting
We tested the most popular affordable models to help you find the absolute best budget audio interface for podcasting. Here are the top performers that balance cost, reliability, and stellar sound quality.
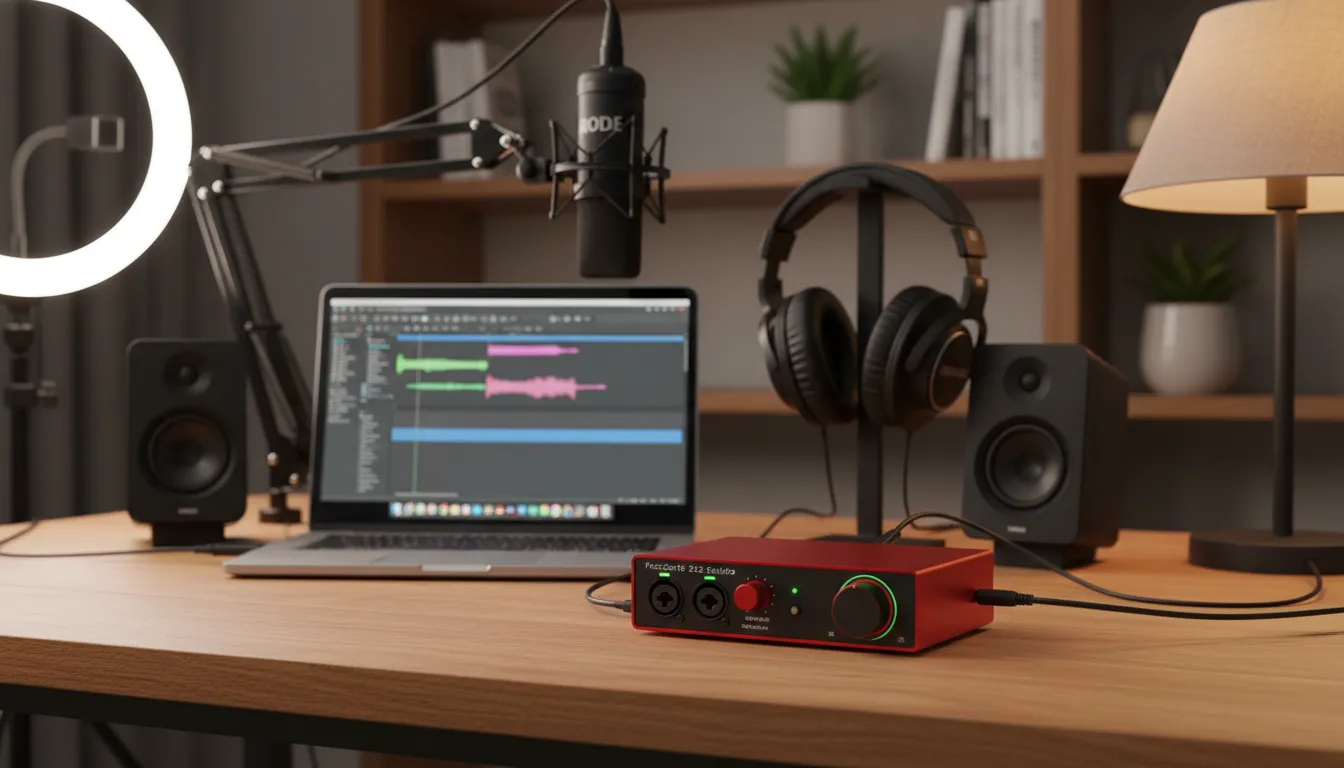
Focusrite Scarlett 2i2 (4th Gen)
The Focusrite Scarlett series remains an industry standard for good reason. The fourth generation features upgraded preamps with an impressive 69dB of gain. This means you can drive power-hungry broadcast microphones without needing external boosters. It also includes an “Air” mode that adds high-end clarity to your voice. The build quality feels premium, and it includes powerful loopback features.
Audient iD4 MKII
Audient brings large-format console sound to the desktop market. The iD4 MKII uses the exact same microphone preamp found in their professional studio consoles. This interface delivers incredibly warm, transparent sound. It also features dual headphone outputs, making it easier to share a mix with a guest if you use an external headphone splitter. The metal casing ensures durability for traveling podcasters.
MOTU M2
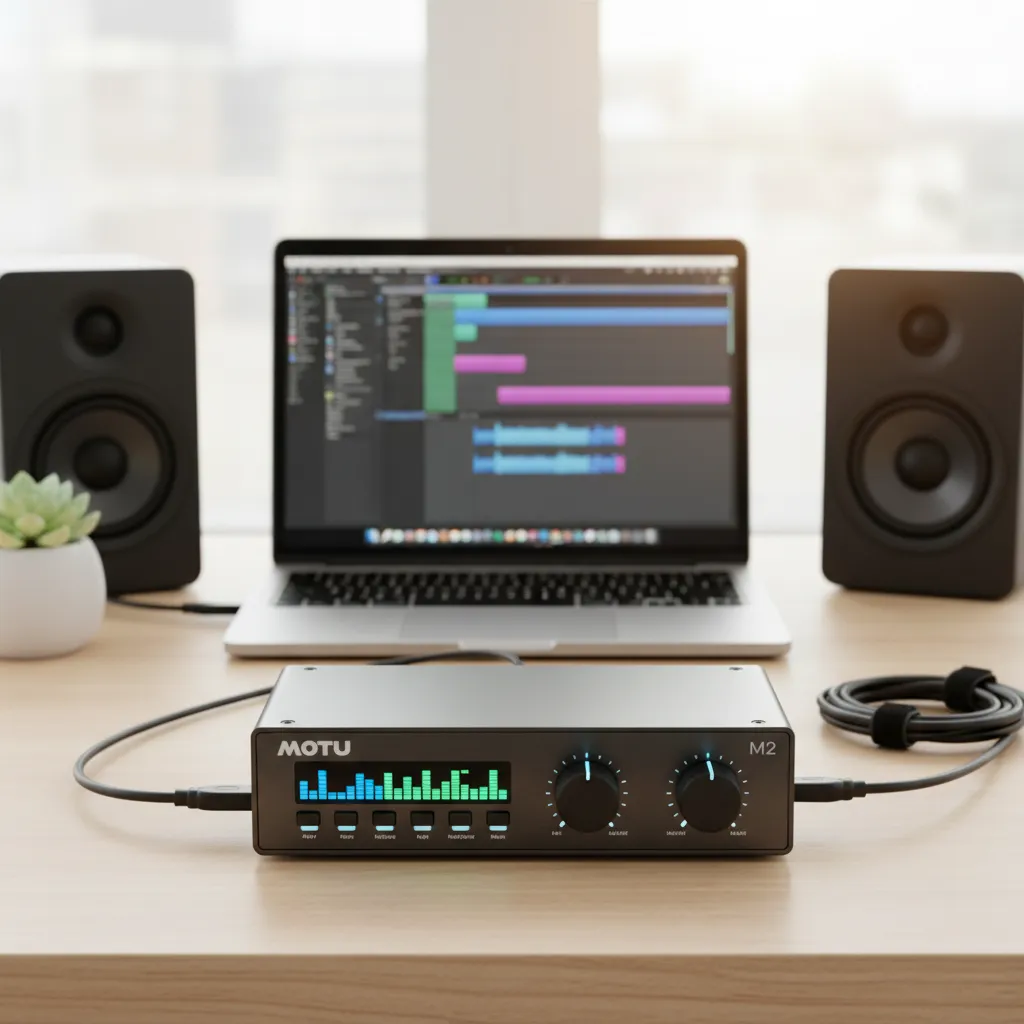
The MOTU M2 stands out visually due to its full-color LCD metering screen. This screen gives you precise visual feedback on your audio levels, preventing you from clipping and distorting your audio. Beyond the screen, the MOTU M2 uses high-end ESS Sabre32 Ultra DAC technology, delivering audio playback quality previously reserved for interfaces costing thousands of dollars.
PreSonus AudioBox GO
If you need ultimate portability and the lowest possible price, the PreSonus AudioBox GO fits the bill perfectly. It easily fits in your pocket but still provides professional phantom power and combo inputs. While the preamps are slightly less powerful than the MOTU or Focusrite, it remains a massive upgrade over direct computer audio.
Interface Comparison Table
Use this quick reference table to compare our top recommendations:
|
Interface Model |
Mic Inputs |
Max Gain |
Loopback |
Best Feature |
Price Range |
|---|---|---|---|---|---|
|
Focusrite Scarlett 2i2 |
2 |
69dB |
Yes |
Auto-Gain & Clip Safe |
$180 – $200 |
|
Audient iD4 MKII |
1 |
58dB |
Yes |
Console-grade preamp |
$190 – $200 |
|
MOTU M2 |
2 |
60dB |
Yes |
LCD Level Meters |
$190 – $200 |
|
PreSonus AudioBox GO |
1 |
50dB |
No |
Ultra-portable design |
$70 – $90 |
Choosing from this list guarantees you get a reliable unit. Your final choice depends on how many guests you plan to host and whether you need advanced visual metering or maximum portability.
How to Set Up Your New Audio Interface
Buying the interface is only the first step. Proper setup guarantees you capture professional-grade audio from day one. Follow these steps to optimize your new equipment.
1. Download Official Drivers
Before plugging anything in, visit the manufacturer’s website. Download and install the latest drivers and control software for your specific operating system. Relying on plug-and-play generic drivers often leads to high latency and missing features.
2. Connect Your Hardware
Connect the interface directly to your computer using the provided USB cable. Avoid using cheap USB hubs, as they can cause power drops and data bottlenecks resulting in audio glitches. Plug your XLR microphone into Input 1 and connect your studio headphones to the dedicated headphone jack.
3. Set Your Audio Levels
Turn the gain dial on your interface all the way down. Speak into your microphone at your normal podcasting volume. Slowly turn the gain up until your meters hit around -12dB in your recording software. This leaves plenty of headroom so sudden loud laughs or shouts do not distort your recording.
4. Configure Your Digital Audio Workstation
Open your recording software. Navigate to the audio preferences menu and select your new interface as both the input and output device. Set your sample rate to 48kHz and your bit depth to 24-bit. These settings represent the standard for modern video and audio podcasting. If you need help editing, review our comprehensive guide on podcast editing basics.
To ensure you fully understand acoustics and hardware placement, we highly recommend reading the Sound on Sound guide to room acoustics, which offers brilliant insights for home studios.
Common Mistakes to Avoid
Many new podcasters buy great gear but ruin their sound through easily avoidable errors. Keep these pitfalls in mind to protect your audio quality.
Pushing the Gain Too High
The biggest mistake beginners make is turning the gain up too high to make the track louder. This causes digital clipping, which ruins the recording permanently. Always record at a conservative level. You can easily boost the volume during the editing phase using normalization and compression.
Ignoring Room Acoustics
Buying the best budget audio interface for podcasting will not fix a terrible recording environment. If you record in an empty room with hardwood floors, your microphone will pick up massive amounts of echo. Place soft furnishings, rugs, and acoustic panels around your recording space to absorb sound reflections.
Monitoring Through Computer Speakers
Always plug your headphones directly into the audio interface while recording. If you monitor through computer speakers, your microphone will pick up the delayed speaker audio, creating a horrific feedback loop or a distracting echo track. Invest in closed-back headphones to prevent sound from bleeding into your microphone.
Pro Tips for Podcasters
Want to push your audio quality even further? Use these expert strategies to make your budget interface sound like a premium studio setup.
Use the Proximity Effect
Dynamic microphones feature a characteristic called the proximity effect. When you move your mouth closer to the microphone capsule, the microphone naturally boosts low-frequency bass tones. This gives your voice that rich, deep broadcast radio sound. Maintain a distance of about two to three inches from the grille for optimal warmth. You can discover more about this in Shure’s definitive microphone technique guide.
Master Your Interface Software
Most modern interfaces come with powerful digital routing software. Take the time to read the manual and learn this software. Understanding how to digitally route audio allows you to easily separate guest audio, soundboard effects, and your own voice onto separate tracks. Multitrack recording makes editing significantly easier and allows you to fix volume imbalances after the interview concludes.
Invest in a Good XLR Cable
Do not plug a high-quality microphone and interface together using the cheapest cable available. Cheap cables lack proper shielding and can introduce radio interference or buzzing into your recordings. Spend a little extra on a balanced, well-shielded XLR cable from a reputable brand to ensure a perfectly clean signal path.
Finding the right gear transforms your workflow. By choosing the best budget audio interface for podcasting, optimizing your gain staging, treating your room, and practicing good microphone technique, you establish a professional foundation for your show. Start recording today, share your unique voice, and watch your audience grow.
Frequently Asked Questions (FAQs)
What is the best budget audio interface for podcasting right now?
The Focusrite Scarlett 2i2 and the MOTU M2 consistently rank as the top choices for budget-friendly podcasting interfaces. They offer clean preamps, low latency, reliable drivers, and durable build quality at an affordable price point.
Do I absolutely need an audio interface to start a podcast?
No, you do not strictly need one to start. You can begin with a USB microphone. However, an audio interface allows you to use professional XLR microphones, offers vastly superior sound quality, and provides better control over your audio levels.
What is phantom power and why do I need it?
Phantom power (labeled as 48V) is an electrical current sent through an XLR cable to power condenser microphones. If you plan to use a condenser mic for your podcast, your audio interface must have a phantom power switch to make the microphone work.
Can I plug two microphones into a single-input interface using a splitter?
You should never use an XLR splitter to plug two microphones into one interface input. This splits the electrical signal, severely degrades audio quality, and prevents you from controlling the volume of each microphone independently. Always buy an interface with two inputs if you need two mics.
What does loopback mean on an audio interface?
Loopback is a feature that routes audio playing on your computer (like a YouTube video, a Zoom call, or a soundboard) back into your recording software. It is an essential feature for podcasters who record remote interviews or use live sound effects.
Why is my audio interface recording only on the left side?
This happens when you plug your microphone into Input 1 and record onto a stereo track in your software. Microphones capture mono signals. Always ensure your digital audio workstation track is set to “Mono” rather than “Stereo” to center your voice.
What sample rate and bit depth should I use for podcasting?
The industry standard for podcasting is a sample rate of 44.1kHz or 48kHz, and a bit depth of 24-bit. These settings provide excellent, broadcast-quality audio without creating massive file sizes that slow down your computer.
Does my audio interface affect the tone of my voice?
Yes, but very subtly. The preamps inside the interface determine how cleanly your voice is amplified. Higher-quality preamps provide a more transparent, accurate representation of your voice with less background noise and static hiss.
Can I use a guitar interface for podcasting?
Yes, most interfaces are built for both instruments and microphones. As long as the interface has an XLR input and a microphone preamp, you can use it perfectly well for your podcasting setup.
How do I fix clipping and distortion on my podcast recordings?
Clipping occurs when your microphone signal is too loud for the interface to process. To fix this, you must physically turn down the input gain dial on your audio interface until your loudest speaking volume registers below the red zone on your meters (ideally hitting around -12dB).


Leave a Reply